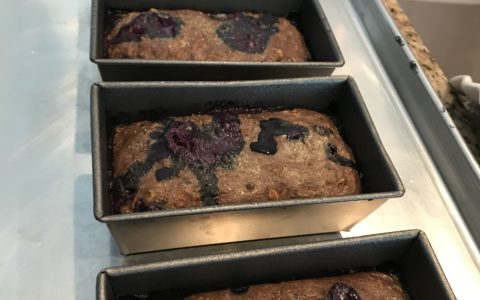
I’ve said it before, I’ll say it again…easy meals that you can make ahead of time will save your clean eating efforts. Prepare this moist, delicious and nutritious Blueberry Breakfast Bake ahead of time and in bulk so your mornings are fast, easy and healthy!
On hand, you’ll need egg whites, Superseed Beyond Fiber, old fashioned oats (uncooked), and blueberries. I like to make little loaf pans but you could certainly make these in multiple muffin tins.
Here are the portions for a typical female breakfast. In general, men can 1.5x – double the portion.
Ingredients:
3/4 cup egg whites
1 scoop Superseed Beyond Fiber powder
1/4 cup old fashioned oats
1/2 cup blueberries
For topping:
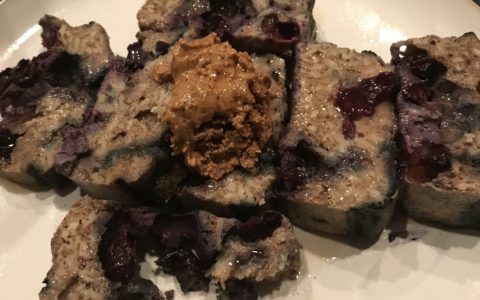
1 TBSP almond butter or any other natural nut butter
Low or No-sugar syrup (to taste)
Mix the egg whites, fiber powder and oats together. In your small loaf pan, place the blueberries then pour egg white mixture on top. Repeat for as many Blueberry Breakfast Bakes that you plan to make ahead of time. Bake at 350 degrees for 30-35 minutes or until the edges pull away from the side of the pan and the center is firm. Cool the breakfast bakes then remove from pans and wrap in tinfoil. Microwave when you’re ready to eat and top with the nut butter and syrup.
The ingredients you’ll have on hand are similar to some of our other delicious breakfasts so you can easily try the Pumpkin Breakfast Bake or the Protein Pancake.
*The exact portions will vary per person. Contact us for more details on your portions and macronutrient breakdown per meal/per day!
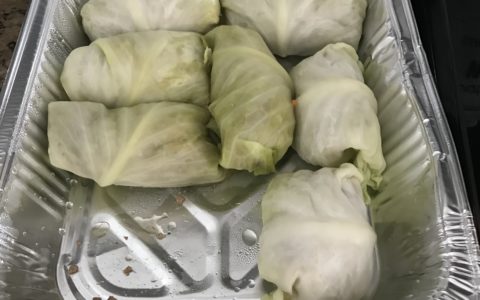
I talk often about convenient meals to help keep you on track during the week. Stuffed Cabbage is both convenient and healthy. The smell they emit while baking is just like Grandma’s kitchen! Assembly is easy and tinfoil pans make clean up a breeze. Stuffed cabbage should definitely be a staple in your “meal plan approved” arsenal.
Here’s how the stuffed cabbage leaves come together:
Place a big head of cabbage in a large pot of boiling water, reduce heat to low-medium and simmer for 10-20 minutes. You may need to rotate the cabbage head if part of it is not covered with water. Once tender, remove the cabbage from the pot and let cool before handling. To peel the leaves, cut the stem off and gently remove each leaf. Make a pile of 10 leaves. You can chop up the remaining cabbage and place on top of the stuffed leaves once finished.
For the filling, we use ground turkey (93/7), but you could also use lean ground beef or ground chicken breast. You’ll need 40 oz. to make 10 leaves. Season your meat with Italian seasoning, garlic powder, pepper, and fennel seed. Use a paring knife to cut out the thick part of the cabbage stem. Then measure 4 oz of meat and place on the cabbage leaf. Roll and tuck in the sides like you would a burrito. Place each stuffed cabbage seam side down in the pan.
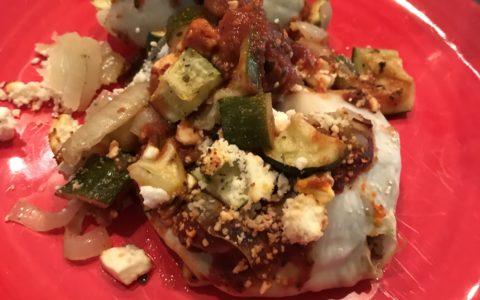
Sometimes I make a big pan of just stuffed cabbage and other times I use a few smaller pans and divide them up. On top of the cabbage pour low sugar tomato sauce generously. I also top with a variety of chopped vegetables such as onions, mushrooms, zucchini and tomatoes. This is where you can also add the chopped up remaining cabbage.
Bake the stuffed cabbage covered at 400 degrees for 20 minutes then reduce the heat to 350 and continue to cook for another hour. Each stuffed cabbage is a 3 oz portion of meat when cooked. Top with your allotted portion of feta cheese (typically 1/4-1/2 cup) and enjoy!
*The exact portions will vary per person.Contact usfor more details on your portions and macronutrient breakdown per meal/per day! There is no need to guess at how you should eat – let us help you eat right for your body type and goals!
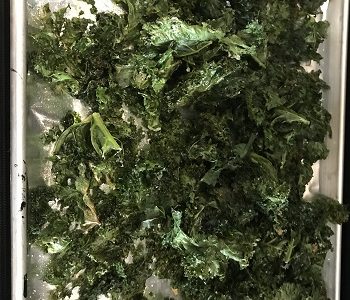
In terms of veggies, usually green means good and Kale is KING! Kale is one of the most nutrient rich vegetables and is chocked full of vitamins and antioxidants. Kale only has 33 calories per cup. There are many ways to prepare this leafy wonder but perhaps my favorite way is to bake it into crispy Kale chips.
To make Kale chips, buy (or grow) Kale stalks or the chopped kale in a bag. Wash the stalks thoroughly then remove the fibrous large center stem. Tear the Kale into small leafy pieces and place on a tinfoil lined baking sheet. If you did buy the chopped Kale, still go through it and remove any of the big stems. Spritz the Kale with non-stick cooking spray and sprinkle with sea salt.
Bake the Kale on 350 degrees for 20 minutes (give or take a few minutes depending on your oven). The Kale should shrink dramatically in size. You’ll be left with crispy, salty, healthy chips. It doesn’t matter if you can’t stop after just one…eat the whole tray if you’d like!
*The exact portions will vary per person.Contact usfor more details on your portions and macronutrient breakdown per meal/per day! There is no need to guess at how you should eat – let us help you eat right for your body type and goals!
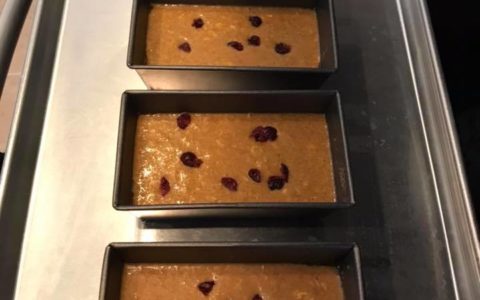
Whether it’s fall, spring, summer or winter, the Pumpkin Breakfast Bake is a delicious treat you will want to eat all year long. They are moist, balanced and packed with fiber. Make several at a time in loaf pans and store in the refrigerator for a fast, on-the-go solution for your early mornings.
The recipe is simple:
3/4 c egg whites
2 whole eggs
1/2 c old fashioned oats
1/2 c pumpkin puree
1 scoop protein whey concentrate (or vanilla whey protein)
1 scoop Super Seed Beyond Fiber Powder
1 TBSP coconut oil
1/4 c dried cranberries
1 dash of ground cinnamon
Combine all of the ingredients in a medium bowl with a whisk until smooth. Pour into a loaf pan and bake at 350 degrees for 40-45 minutes. I usually make 3 Pumpkin Breakfast Bakes at a time in order to use the whole can of pumpkin. Each bake is approximately 2 breakfasts for women and 1-1.5 breakfasts for men. There is no need to guess at how much you should eat though. *The exact portions will vary per person.Contact usfor more details on your portions and macronutrient breakdown per meal/per day!
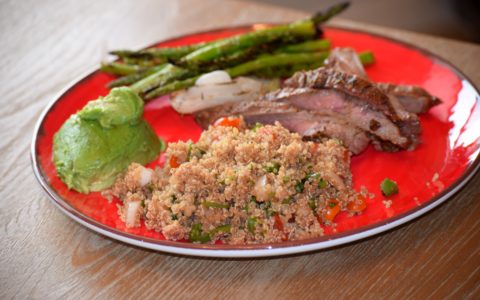
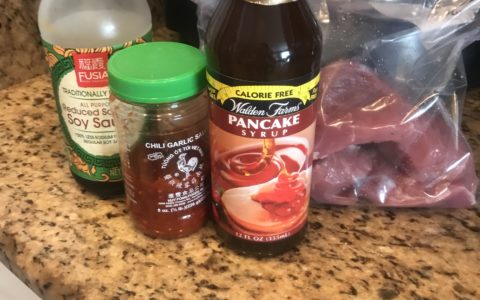
What do people miss most when they diet? Good tasting food of course! Make your healthy eats taste great with simple ingredients that don’t add many calories to your meal. Our Sweet & Spicy Pork Tenderloin combines soy sauce, calorie free syrup and spicy garlic chili sauce to make a delectable marinade.
Here’s what you’ll need to get started: trimmed Pork Tenderloin – or trimmed chicken breasts or flank steak. Place your meat in a large resealable plastic bag. Combine equal parts of the three ingredients in a bowl and whisk until combined. Pour the marinade over the meat and seal the bag. Toss the meat around in the marinade until it is well coated. Keep refrigerated until an hour before cook time.
For my recipe I used 1/4 cup of each of the marinade ingredients and two pork tenderloins. You could make a little extra marinade to place on the side and drizzle over the meat once it is cooked. You can broil, grill or bake your pork tenderloin, chicken or steak. The finished meat pairs nicely with broiled asparagus and avocado.
I was so excited to find out we were expecting baby number two. Our first born, Liv, is such a special part of our lives that doubling our love only made sense. Like any expecting mom, I juggled work, house work, caring for my daughter, preparing for baby #2 to come, and keeping my body healthy for 39 weeks. I experienced challenges with this baby that I didn’t have with my daughter — I was nauseous and sick more, I had insomnia yet extreme fatigue, and my lower back ached most of the third trimester. On the plus side, I had more excitement and anticipation because I was able to share the joy with my two year old who couldn’t wait to have a baby at home. So the good with the bad, my second pregnancy was as much of a blessing as my first, it was fun yet difficult at times and it was also filled with as much love as I could imagine. I would do it all over again in a heartbeat to have the end result, a beautiful and healthy baby boy, Mack Joseph Check.
Sharing My Journey – The Workouts & Milestones
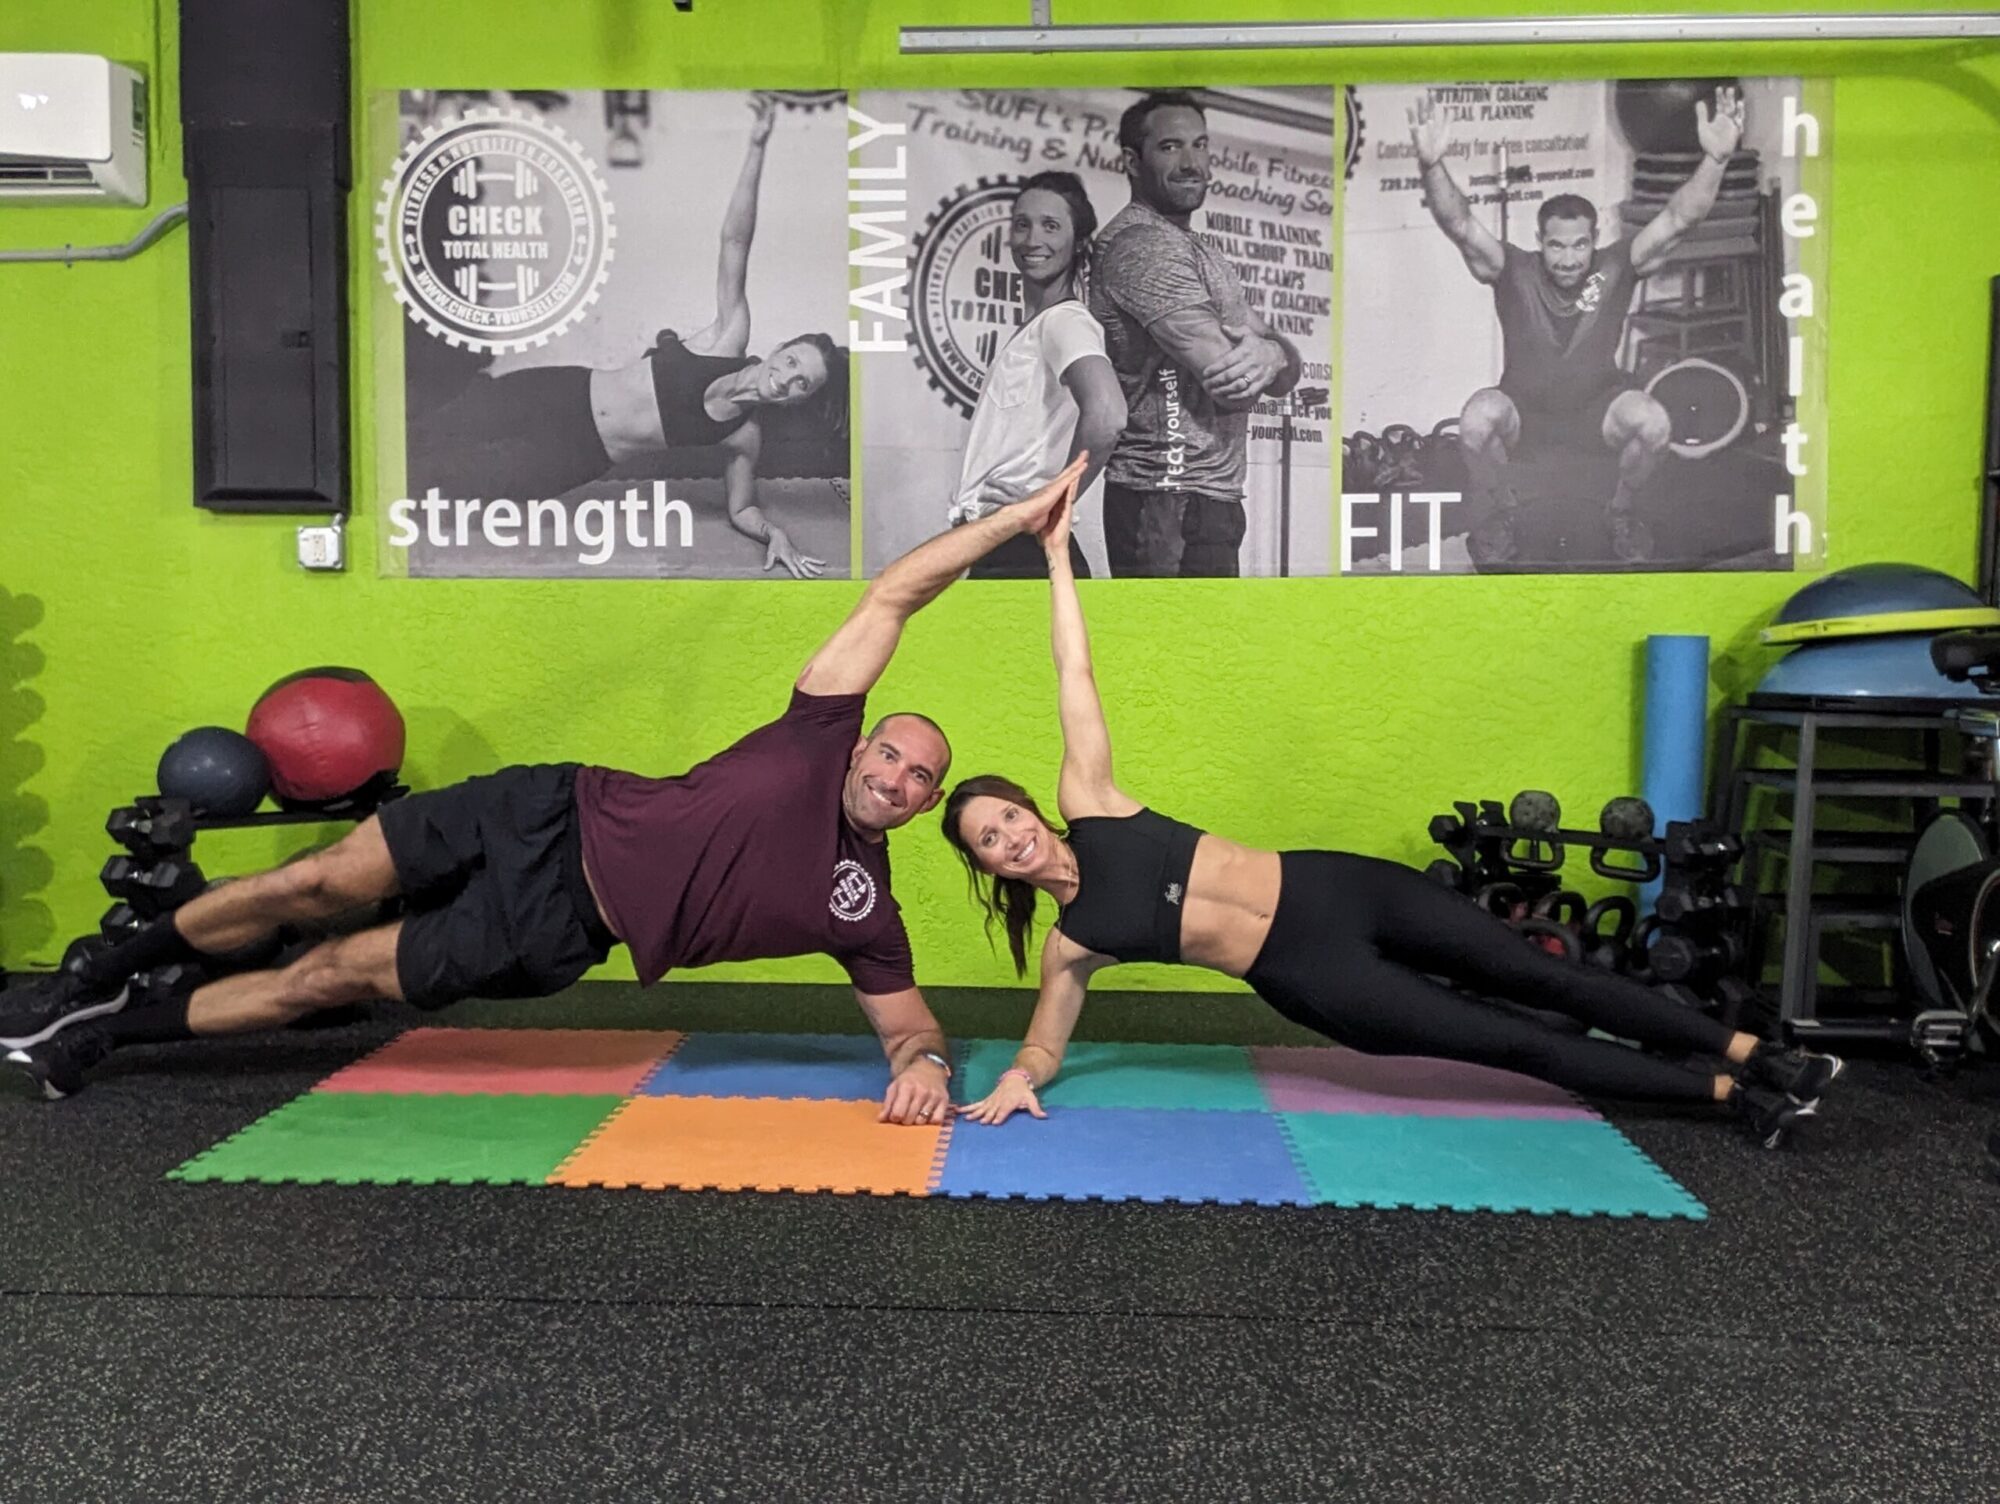
I enjoy telling my friends, family and clients about my FIT pregnancy and resulting easy delivery. The two are definitely related, that I’m sure! I’ve done it twice now, two pregnancies filled with mostly healthy eating and working out & two deliveries that were uneventful and some may even say “easy” (especially the second one which I’ll tell you all about next). For those of you who followed my first journey, My Fit Pregnancy, Delivery and Recovery, you’ll recall an overarching theme, I ate healthy meals consisting of proper carb, protein and fat ratios and I worked out throughout the entire pregnancy – listening to my body and its limitations. For a breakdown of a typical day of eating, visit my first fit pregnancy article to help you plan your meals.
My second fit pregnancy was much of the same as my first with a few changes. I did more planking and more stationary biking, two largely safe exercises for pregnant women. On average, I’d say I planked about 10-15 minutes each week and because I am a group cycle instructor, I was able to bike 3-5 5o minute classes each week. Planking can be modified as necessary but in general most variations of regular planks, side planking and reverse planking are acceptable. Next to swimming, stationary biking/group cycling is one of the best cardio exercises you can do while pregnant as it is low impact and the risks to injury are minimal. In addition to healthy eating and biking, I maintained a regular strength and resistance training regimen and stretched daily. Again, modifying exercises becomes applicable in the second trimester so knowing how to make safer adjustments is important.
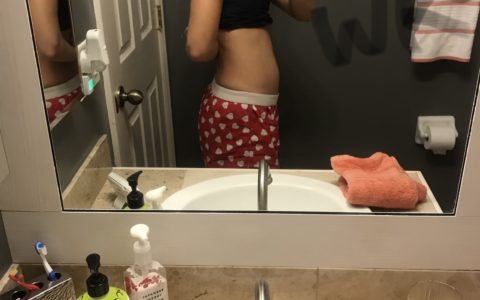
In my first fit pregnancy blog, I posted progress pictures and detailed the three trimesters. As much of this pregnancy was a repeat of the first, I’ll just post some new pictures of the trimester milestones and discuss weight gain. Different from my first pregnancy, I barely gained any weight the first trimester. I was sick several times and just didn’t seem to put weight on. I started my pregnancy at 119 lbs and was around 123 at the end of the first trimester. The second trimester is where the big gains took place; I weighed in at 137 lbs at week 27; this leveled out with my first pregnancy as I was a similar size at this point. Then the last lag I gained about 8 more lbs and delivered our baby weighing 145 lbs. I ended up gaining about 26 lbs during this pregnancy. I started out smaller than I did with our first born but I ended up about 5 lbs heavier in the end. With Mack I had an appetite all the way to the day I delivered, whereas with Liv, I ran out of room and just couldn’t eat anymore so I actually lost weight the last few weeks of pregnancy.
Day 1 of Pregnancy
End of 1st Trimester
End of 2nd Trimester
End of 3rd Trimester
The Delivery
I spent nine months convincing myself that the delivery part isn’t that bad, but no matter how easy it was the first time it was still hard. Delivering Liv was the hardest thing I ever did but it was also my greatest accomplishment so no matter what, I was excited to do it all over again. Delivering baby # 2, Mack Attack, really was a surprisingly easy endeavor (as far as labor is concerned). Ladies, don’t throw tomatoes at me, I don’t mean to say I didn’t work hard and it didn’t hurt, it’s just that it was not that bad and again I attribute this to the fact that I was STRONG, FIT and ready to push!
With Mack, I started having Braxton Hicks contractions around week 17, that’s 12 weeks earlier than I had them with Liv. Right around the end of my 38th week they were noticeably more intense and because I was 4 cm dilated, I went to the hospital to see if I was in labor. While the contractions certainly didn’t take my breath away or stop me in my tracks, they were different than my first pregnancy and I wasn’t sure if they were just more Braxton Hicks or real contractions. When the hospital released me with false labor I went home and got back to normal living – walking outside for about an hour a day and doing light strength training and stretching.
The evening of June 16, 2018, my husband, Justin Check, our daughter and I sat down to a nice dinner. We also binge watched several episodes of Shameless then turned in for an early night around 9:30pm. Around this time I decided to start timing my contractions as they did seem a bit more painful than what I had become accustomed to. They were around 3 minutes apart when I felt a weird snap in my stomach. Then with each contraction I “peed a little”; later realizing that “snap” was my water breaking. When my legs started shaking we decided this must be real labor so we headed to the hospital.
By the time we were driving the pain and intensity had skyrocketed and the contractions were definitely the real deal. We arrived at Cape Coral Hospital at 10:26 pm. For those of you following along, at this point I had been in labor for less than an hour. The nurses were quick to get me checked out – I was already 10 cm, water broken, and holding back the urge push. The nurses were hoping I could hold baby Mack in long enough for a doctor to arrive but only three big pushes later out came little Mack! The nurses did a great job delivering our sweet baby boy and we felt so lucky to be in their capable hands. The doctor showed up to assess and deliver the placenta. There was no noticeable tearing and no stitches needed. Weighing 7 lbs and 6 oz & 20 inches tall, Mack came into this world at 10:48 pm – just over an hour after I first started having painful contractions. His fast and furious entrance was a blessing and we were so excited to meet him, be done with the hard part, and start the love fest!
The Aftermath
With time on my hands in the hospital, I mostly kissed all over my sweet boy, shared the joy with family and thought about the whirlwind of a delivery I had just experienced. The whole event kept circling in my mind and I kept thinking how easy it was and how awesome that I was only in pain for an hour. I had used my strong core (thanks planks!), strong legs, and my muscle awareness to push baby number two out in a hurry. It is no coincidence that Mack made his entrance in record time and with minimal damage to my body thanks to fitness!
Within a week of delivering I largely felt back to normal. I started some light cardio, stretching and upper body band work. Then 3 weeks after delivering, I added some body weight exercises to my routine – squats, lunges, planks. I couldn’t believe how quickly I felt back to myself. I’m not suggesting everyone should be able to workout shortly after having a baby, or risk your body healing properly, but for me, I could tell my body was ready to move. I listened to how I felt and took it easy until I was 100% sure I could handle lifting weights and stepping up the cardio! Again, my theory is the stronger you go into delivery, the easier it will be, the faster you will heal, and the quicker you can get back to being you!
Fast forward to me writing this article and I am nearly in all of my pre-pregnancy clothes. At almost 6 weeks postpartum, I’ve lost about 20 lbs of the weight I gained. I have about 5 more pounds to lose but I have more work to do on my composition. During pregnancy I was not able to keep the muscle mass that I normally have so now that I’ve taken most of the weight off, it’s time to work on changing my composition to increase muscle and decrease fat. Ladies, it’s a work in progress! But, I feel so much more like me and I’m so proud of the baby I gave birth to, my journey to get there, and the aftermath!
Should you have any questions on what I did before, during or after my pregnancy to stay healthy and fit, I’d be happy to answer them. Seeking professional help to ensure proper nutrition and safe fitness during and after pregnancy is smart. Email me if you’d like help you with your journey!
Basil, balsamic vinegar, and tomatoes are the basis for a delicious bruschetta. There’s no crispy bread or rich cheese in this recipe but I promise you won’t even miss them when you try our Bruschetta Quinoa. Quinoa is one of the superfoods that everyone has been buzzing about. It’s gluten-free, high in protein and one of the few plant foods that contain all nine essential amino acids. Quinoa also has a nutty flavor and provides satiety that is long lasting!
Here’s how to make my Bruschetta Quinoa. You’ll need 1 cup chopped fresh tomatoes, a handful of chopped fresh basil (or 2 TBSP dried if its all you have), 1/2 cup chopped onion (green, red or sweet white will all work), and 1/4 cup finely chopped spicy green peppers (we grow these in our garden so I have an abundance; you could certainly leave out or add a jalapeno or some bell pepper instead). Add the above ingredients to 3-4 cups of cooked quinoa (follow package instructions to cook). We also make this same salad with couscous and it is also delicious. Fold in 1/2 cup of balsamic vinegar until it nicely coats the whole salad. Sprinkle with salt and pepper to taste.
This amazing recipe and all of the Check Total Health “Healthy Eats” are created and tested by us! Try our other recipes here.
*The exact portions will vary per person.Contact usfor more details on your portions and macronutrient breakdown per meal/per day! There is no need to guess at how you should eat – let us help you eat right for your body type and goals!
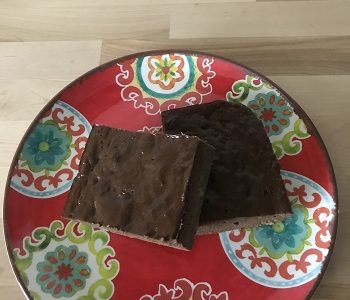
Chocolate and peanut butter are perhaps one of the best combinations ever discovered in the culinary world. But have you ever known their marriage to be healthy? Would you think a chocolate peanut butter brownie would be good for you? Believe it or not, these decadent protein brownies are a perfect quick breakfast or post workout meal. They have no flour, sugar, or oil and their sweetness comes from bananas so their packed with potassium. These protein brownies have as much nutrients as flavor – trust me that’s saying a lot. — Make them now!
Here’s how:
You’ll need 6 very ripe medium length bananas (7-8 inches long). Mash the bananas until mostly smooth. Add in 2/3 cup whey protein concentrate, 1/2 cup powdered peanuts (I use PBFit), 1/2 cup natural smooth peanut butter, and 1/4 cup unsweetened cocoa powder. Stir until well combined. Spread into a generously greased (with nonstick cooking spray) pan. The thinner the batter the less time they need in the oven and the texture will be more like a brownie. I like to use a 8x11x3 glass pan. Bake the brownies at 350 degrees for 20-25 minutes. Brownies should lightly pull away from the side of the pan and no longer jiggle when they are done.
This recipe yields 8 protein brownies with each having 267 calories, 17 grams of protein, 28 g of carbs, and 10 g of fat.
*The exact portions will vary per person.Contact usfor more details on your portions and macronutrient breakdown per meal/per day! There is no need to guess at how you should eat – let us help you eat right for your body type and goals!
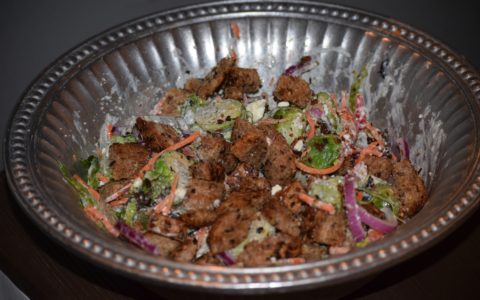
Can you make salad dressings without oil or mayonnaise — yes you can! Salads can be a fun way to mix up your daily vegetables and they can still taste great even without oil and mayo. Typically, I just use fresh lemon juice, salt and pepper to dress a salad. Sometimes I kick it up a few notches though! This particular salad is a Brussel Sprout Green Goddess with Ezekiel Bread croutons. Here’s how to make this delicious salad come to life!
To begin, slice your Ezekiel Bread into small cubes and toss lightly with olive oil and salt. Cook in a non-stick skillet over medium heat for a few minutes or until lightly toasted. Remove the croutons from the pan and allow to cool.
Remove the ends and slice your brussel sprouts in half. Place brussels on a tin-foil lined baking sheet that you sprayed with non-stick cooking spray and sprinkle the brussels with salt and pepper. Place under the broiler on high for 10-15 minutes shaking the pan every few minutes to promote even cooking. While they are cooking, slice red onion, red pepper, tomatoes and carrots and place in a large salad bowl.
To prepare the dressing, mix 2 tablespoons plain, non-fat Greek yogurt, the juice of a half of a lemon, 2 tablespoons feta cheese, and 1 tsp Penzey’s Green Goddess Dressing base. Once combined, the dressing is ready to be tossed on all of the vegetables. Then top the Brussel Sprout Green Goddess salad with the Ezekiel Bread croutons.
*The exact portions will vary per person.Contact usfor more details on your portions and macronutrient breakdown per meal/per day! There is no need to guess at how you should eat – let us help you eat right for your body type and goals!
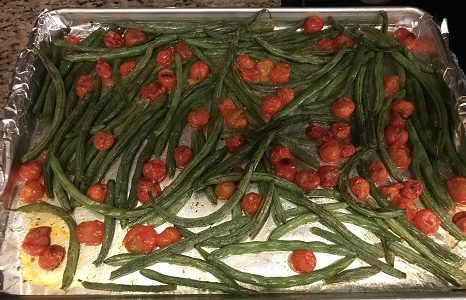
Cherry tomatoes so earn their name as they can be as sweet as cherries! Use natural ingredients and let them shine! Blistered Tomatoes & Green Beans will be an instant favorite with your family. This dish is fast and easy to prepare, perfect for weeknight cooking in a pinch.
To prepare, wash and trim your green beans. Also wash and dry your cherry tomatoes. Line a large baking tray with tinfoil and spray generously with non-stick cooking spray. Lay the green beans and tomatoes in a single layer on the tray. Season with salt, pepper and garlic powder. Broil on high (top or one rack down from the top) for 15-20 minutes or until the tomatoes blister and burst. The green beans should also have nice color to them.
Let cool slightly before serving as the tomatoes hold a lot of heat! Enjoy.
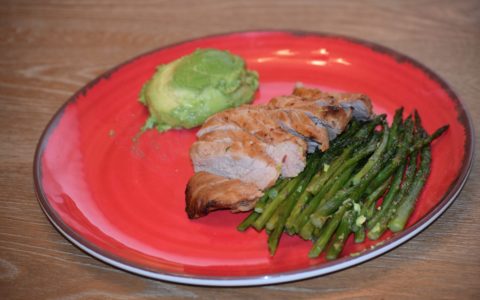 For my recipe I used 1/4 cup of each of the marinade ingredients and two pork tenderloins. You could make a little extra marinade to place on the side and drizzle over the meat once it is cooked. You can broil, grill or bake your pork tenderloin, chicken or steak. The finished meat pairs nicely with broiled asparagus and avocado.